
5 Do-It-Yourself Projects for Building a Cozy Birdhouse That Your Feathered Friends Will Love
With twitters at dawn and chirps at dusk, birdwatching is a calming activity. By giving these lovely creatures and the birds a shelter, you benefit. So let's get started with some enjoyable and rewarding DIY birdhouse building ideas.
1. Start by constructing a basic wooden birdhouse.
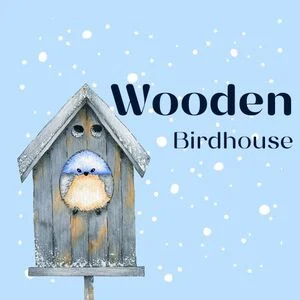
DIY enthusiasts would be wise to begin with constructing a straightforward wooden birdhouse. This project, which requires little in the way of materials and carpentry knowledge, will provide you a delightful and successful experience as well as a comfy sanctuary for your feathered friends.
A wood board (such as cedar, pine, or plywood), nails, hammers, woodsaws, entrance hole drill bits, exterior-grade non-toxic paint, wood glue or strong adhesive (optional), and other supplies are required.
Step-by-Step Building Guidelines for a Simple Wooden Birdhouse
Step 1: Divide your wood board into the following six portions by measuring and cutting it:
2. 4" x 4" x 12" side walls, two sections 3. Back: 5" x 7"
4. Two 4" x 6" roof parts. 3. Base: 4" x 4"
The roof's components will have a little amount of overhang on each side to provide protection from the sun and rain.
Step 2: Carve the ventilation and entrance holes
Select a drill bit that fits your wood properly; it should be between 1 14" and 1 12". Make sure the entrance hole is smooth and free of splinters before drilling it about 2" from the top of one of the side walls.
For ventilation, drill two tiny holes (about 14 diameter) near the top of the opposite side wall.
Step 3: Assemble the birdhouse
The birdhouse should be put together with nails and strengthened with wood glue. Following is the right order for a rapid assembly:
1. Prior to joining them, make sure the rear piece and the bottom of the sidewalls are in line.
2. Attach the side walls to the base with screws.
3. Attach the front piece (which has the entrance hole), side walls, and base together.
4. Ensure there is a modest overhang on each side for safety and nail the roof pieces to the side walls and rear piece.
Step 4: The birdhouse is painted and embellished
To add color to your birdhouse, choose an exterior-grade paint that is environmentally safe. If you use lighter colors for the birdhouse, it will be more comfortable in hotter climates because they absorb less heat. Once the paint has set, feel free to embellish your birdhouse with decorative details.
Step 5: Install Your Birdhouse
Select a location for your birdhouse that is protected from strong winds, safe and secure, and free from predators. Install it using a sturdy support, like a pole or a branch from a tree. Another wise choice is to make sure the entrance hole is facing away from the sun and the rain.
You have successfully built a simple yet functional wooden birdhouse! By providing food, water, and a safe place for nesting, you can watch as various birds establish homes in your garden and improve their welfare.
2. A terra cotta birdhouse
If you're looking for a simple and aesthetically pleasing birdhouse concept, a terra cotta birdhouse can be a smart and unusual alternative. Terra cotta is a suitable material due to its durability and rustic, earthy appeal. Although it might be a fun family activity, this project does require some fundamental making skills.
Materials needed include two terra cotta pots, one big (for the house) and one little (for the roof).
• Water-resistant adhesives, such silicone adhesive or epoxy
• Acrylic or ceramic paint that is nontoxic
• Durable twine or rope for hanging
How to Build a Terra Cotta Birdhouse:
Step 1: Prepare
Make sure your terra cotta pots are clean and clear of any debris before using them. This will create a cleaner workspace and improve the paint's adhesion.
Step 2: To glue the pots
The larger pot serves as the main frame of the house; apply waterproof glue to the bottom of it. By turning the smaller pot upside down, you may attach it to the larger pot as the roof. To one another, make sure they are centred. Let them dry as directed by the glue's manufacturer.
Step 3: Painting should be done after the glue has completely dried.
Use non-toxic ceramic or acrylic exterior paint to create your birdhouse. Lighter colors are suggested as they reflect sunlight and help to maintain the ideal temperature indoors.
Step 4: Sealing
Some people decide to apply a clear, non-toxic sealer to their painted surfaces once the paint has dried. By following these steps, you may increase the lifespan of your birdhouse and protect the paint pattern from bad weather.
Your terra cotta birdhouse may now be hung. Place the twine or string through the bottom hole of the larger pot, make a knot to hold the string, and make sure it is tight. In a safe part of your garden, hang your new birdhouse from a shepherd's hook or a tree branch.
This easy-to-make terra cotta birdhouse not only inspires creativity but also provides a safe habitat for birds and a rustic touch to your outdoor décor. Start this project right away to enjoy backyard birding.
3. Birdhouse made with wood
If you're looking for a DIY project that is both creative and useful, a rustic log birdhouse is a fantastic choice. It adds a lovely finishing touch to your yard and creates a comfortable sanctuary for the birds. This project does need a little bit more manual labor, but the result is well worth it.
A small log or large branch (10-12 inches long and 4-6 inches in diameter), a chainsaw or bow saw, a drill and a wood-boring drill bit (the size of the bit will depend on the type of bird you want to attract), a wood chisel, a hammer, and sandpaper are all required tools for this project.
Steps for Building a Rustic Log Birdhouse
Step 1: Cut the log first.
Choose a solid log with a length of between 10 and 12 inches. Make two cuts into the log with your chainsaw or bow saw. The longer piece (about 8 to 9 inches long) will serve as the birdhouse's body, while the shorter portion (2 to 3 inches long) will serve as its roof.
Step 2: Hollow out the log
Hollow out the centre of the larger piece of the log using your drill and chisel. Make sure you leave about an inch of wood for the sides and bottom. Be careful to preserve as much of the exterior bark as possible to preserve the rustic aspect.
Step 3: Drill the Entrance Hole
Select a suitable wood-boring drill bit based on the species of bird you wish to draw. Drill the entrance hole on one side of the log, making sure the surface is clear of debris and splinters.
Step 4: Make roof repairs
Attach the smaller piece of the log to the top of the larger one using nails or outdoor wood glue. Aim for an overhang at the entrance for weather protection.
Step 5: Sand and clean
Use sandpaper to remove any rough edges to make the birdhouse safe for your feathered friends. Clean the inside of the birdhouse to get rid of any remaining wood shavings.
attach your birdhouse there.
Step 6: Your log birdhouse is now ready to be hung
Choose a spot that is safe from wildlife and bad weather. Make sure it is hanging securely so that it can support the weight of the birds and any upcoming nestlings.
With this rustic log birdhouse, you can provide birds with a comfortable haven while also adding a charming, natural feel to your environment. Watch the birds while you wait for their cheery chirps and tweets.
.
4. Creating Birdhouses from Recycled Materials

To draw birds to your garden, not everything in it needs to be brand-new. Sometimes all you need are some common recyclables and a little imagination. Here, we'll examine two straightforward techniques for turning a plastic bottle and a tin can into lovely birdhouses.
a little birdhouse
Make a comfortable home for birds out of your waste. This is a fantastic first activity and a good way to engage kids in environmental and recycling education.
You'll need non-toxic, eco-friendly paint and a clean tin can.
• A drill, a coat hanger, or hanging thread
Step 1: Making a Birdhouse Out of Tin Cans:
Carefully wash and dry an empty tin can.
Step 2: Drill a big hole (between 1" and 2" in diameter
Depending on the species you are targeting) into one side of the container to serve as the entrance.
Step 3: Paint the can
Whatever you like using non-toxic paints. Build a birdhouse that is as beautiful as you can
Step 4: After the paint has dry, drill two holes into the top side of the can.
Step 5: Use a wire or piece of twine to pass through these holes to create a hook from which to hang your birdhouse.
Step 6: pick a location free of noxious animals and bad weather. While you hang it up, wait for your new guests!
Birdhouse constructed of plastic bottles
Like the tin can birdhouse, a plastic bottle birdhouse is easy to construct and helps reduce household trash.
The following materials are required: • A clean bottle of plastic
• Tiny wooden spoons or sticks as perches
• Optional non-toxic paint for embellishment; Hanging string or wire;
How to Turn a Plastic Bottle Into a Birdhouse:
Step 1: involves cleaning and drying a plastic bottle of the specified size.
Step 2: Cut or drill a big hole through one side of the bottle to create the entry.
Step 3: Set a wooden spoon or stick beneath the hole to create a perch. Before continuing, make sure it is steady.
Step 4: Secure the bottle's neck with a dangling wire or piece of thread.
Step 5: If desired, use non-toxic paint to adorn the birdhouse.
Choose the best location to place the birdhouse in your garden in
Step 6: Choose a spot that is safe from wild animals and bad weather.
Recycling materials to build your own birdhouse is advantageous for the environment and your inventiveness. It's a great way to get kids interested in environmental protection while they're still having a good time. Enjoy the process of creating your recycled birdhouses!
5. Teapot Birdhouse
An old teapot can be transformed into a charming, unusual birdhouse.
The first step is to clean the teapot.
2. To prevent the lid from coming off, use adhesive.
3. Hang it firmly and uniformly from a sturdy branch or hook.
Because providing a safe habitat for birds is its primary function, a birdhouse should always be constructed of non-toxic materials and painted with non-toxic paints. To ensure that birdhouses remain a safe haven for birds, they must be routinely cleaned and maintained. With these ideas, the plump chirpers have a chance to create a special, comfy nest, and your landscape gains a charming, rustic addition. Enjoy your building!